Recent: Trying to find lawn mower part- Power Devil PDG4037R?

Mend Refrigerators

Mend Kitchen Appliances, Refrigerators
Find out how to mend it for free.

Ask Question
Mend Kitchen Appliances, Refrigerators
Free repair help for refrigerators

Mend > Refrigerators

Mend Kitchen Appliances, Refrigerators

how do i replace the thermostat on my scandinova lf111d fridge ?

i have purchased a replacement thermostat for my fridge but dont know hw to change it. can anyone help.

lisa

lisa luckman
December 2005
... oh just to add i didn't go with the Ranco VT9, the local repair shop knew which one it was when I popped in. Best to take the thermostat out (leave the string in place or rethreading is quite literally impossible) and take it with you ... :)

Jezz
October 2013
Thanks once again Rob and Nick (echoing down the years) - I never did report back after 210 and I've just had to do the same repair again on my ff6745d fridge/freezer - but it was the separate freezer thermostat this time. Instructions still work a treat, except on my model the middle lead thing isn't applicable, but the repair is. Many, many thanks guys :)

Jezz
October 2013
Just fitted mine, thanks for the instruction Neil's. works as well in 2013 as it did back in 2006

Keef
February 2013
These are brilliant instructions - especially the piece of string trick, because on my ff6745d fridge, rethreading that looks very tricky. The middle lead trick on the compressor is a better diagnostic and temp. fix tip than I've seen anywhere. Thanks so much guys. I can't fing an original part for my model on espares (out of stock), so I'm going to give it a go with a generic Ranco VT9 and I'll report back. Thanks so much for taking the time everybody here (I spent hours elsewhere).

Jezz

Jezz
October 2010
Great instructions Neilm & Rob - i've got a Scandinova LF136d and changing the thermostat was very straight forward, even for a novice!

The only thing on the LF136d that is different is that where the middle connection point in the black box under the LF111d is unoccupied, it is occupied on the LF136d. This point provides power to the light in the larder section (bottom half) of the fridge. Simply pull out this connector from the black box and the rest is as neilm & rob have explained.

Thanks guys!

Rish
October 2010
Many thanks for this advice. I made a big mistake prior to finding these instructions. Thinking that the back plate of the fridge had to come off. That is the big aluminium plate covering the whole 'outside' back. I started top prize it off and discovered - horror of horrors - that the pipes that release the heat are bonded to it. Did a bit of damage, I think, but hope all is well - even if not quite as efficient as before. Just as well I Googled this site before continuing.
When I then followed the instructions on this site, and removed the white plate 'inside' the fridge, the rest was easy. Thanks.

Stephen Hudson
July 2010
Thank you Neilm and Rob.
Fantastic instructions. Got the thermostat from espares and now have a fully functioning fridge for £23.00.

Feri
May 2010
thats, great instructions, so far so good, i'll have to order a new stat and let you know how i get on.

rob
August 2009
just as a very first thing, I took a rubber hammer and gave the thermostat/temp control dial a hard sharp tap, and it has been working for the past month. I know I'll need to replace it but worth a go in the short run

Nick
December 2007
STOP; READ THIS FIRST!
Excellent instructions form Neilm but...........
I have just replaced the thermostat; it is easy to do.
MAKE SURE POWER IS OFF.
1) Don't cut off the tabs on the black box at the rear; they are hinges for the lid; just leaver it off/ down from the left hand side (when looking from the back); it will swing down easily, enabling safe replacement when the job is done.
2) You don't need to remove the door to take off the fascia at the top of the fridge. It saves a lot of time and agro. Just make sure the door swings open as fully as possible.
3) Get some insulation tape/ sellotape and a reel of cord/ string. Tape 10 to 15 cm of cord/string to the OLD thermostat tubing whilst still in position BEFORE you pull it out. When you gently pull out the old tubing from the front the cord/ string will follow through all the pipes and bends. When fully out repeat in the opposite direction with the cord taped to the new tube end and the new tube will be threaded back through with ease!
Thanks for the rest of the instructions; switching the wiring at the back was a great diagnostic help confirming that a faulty thermostat was the problem.
Fully functional repair for £23.50

Rob
June 2007
Okay,

Tools for the job, wire cutters, medium size flat screwdriver, a number 25 star drive (an allen key will do) at least 60 mm long. approx 1/2" spanner or pliers to undo a nut, a cross head screwdriver, a pointed knife or fine screwdriver to remove the control panel bolt covers.

I have the same problem and have had a look.

The spare part can be bought from

http://www.espares.co.uk/parts/fridges-and-freezers/scandinova/if111d/p/1084/1198/0/546871

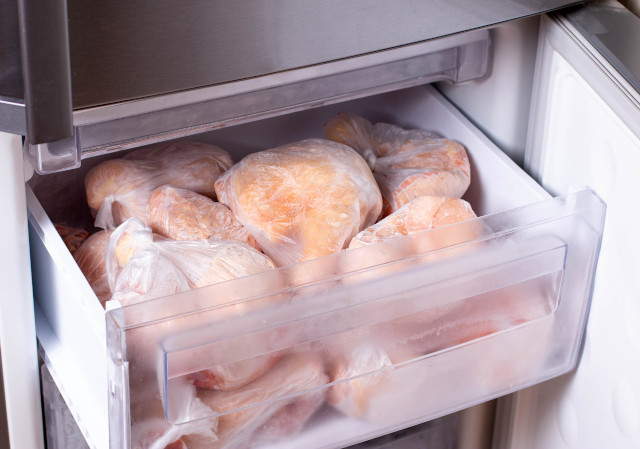
When you find the fridge has warmed up, the first thing to do is get it working all be it full on without the thermostat.

Get the fridge away from the wall, TURN OFF THE POWER, clean all the fluff and gunge that has accumulated under the fridge and get down on the floor to have a look behind. There is a a black plastic box on the left hand side (looking from the back) with the power cable going in.

The cover needs to come off, this is not the approved method but, there are two 'wings' sticking out from the top side of the box, cut them off and lever the cover off. The are two square holes on the opposite side of the box which have 'open' next to them but I didn't see that until the cover was in my hand.

There are two power leads under the cover, one from the mains, the other going to the large black cylinder in the base of the fridge, the compressor pump, and there are three lead connection points the middle one being empty. It appears that the Scandinova people have thought about thermostat failures. Unplug the compressor lead and put it back in to the central connection point. Then turn on the power and the fridge should start to work. Ours now has -10 degrees on the temperature gauge too cold but better than no fridge. Put the fridge back to the wall and continue to use for the time being.

Order the thermostat.

Re-placing the thermostat.

TURN OFF THE POWER. Empty the fridge.
Remove the door using the star key on the two bolts at the top of the hinge. Do this with the door shut whilst the hinge is undone, then gently lift the door off over the light cover in the top of the fridge.

The thermoststat is behind the temperature control in the control panel at the top of the fridge. The coin operated 0 – 7 control on the right.

Remove the light cover by turning it leftwards and gently pulling it away.

Using a fine screwdriver or knife take the three covers out of the control panel. Behind are three bolts with the same size head as the door bolts. Remove them.

Remove the temperature control knob, or let it will come off as you take off the control panel cover. Gently ease the control panel off. It will probably be a bit caught on the thermostat probe tube.

In the back of the fridge is the cooling panel. Slacken off the two cross head screws which are clamping the thermostat probe to the back of the cooling plate.

Use the flat head screwdriver to push in the four spring loaded catches holding the cooling plate. Push in the sprung nob and whilst doing that pull the cooling plate of the mounting post (firmly but carefully). When you have undone the last one the plate can be swung aside to reveal the thermostat tube, unclip the tube from the back of the cooling plate and at the control panel withdraw the tube from where it goes into the top of the fridge. As you pull it out it will get stuck on any bends in the pipe behind the cooling plate so straighten it as you go. You can now cut off the tube if it is getting in the way.

I am still at the waiting for the thermostat stage. So the rest is supposition!

Take careful note of which lead goes where on the thermostat and unplug all the cables on it. Undo the nut holding the thermostat in place and now you are ready to put the new thermostat in place.

First put the compressor pump cable back onto its original connection.

Simply do in reverse what you did to take it all apart, mounting the new thermostat onto the control panel, reconnecting the wires to the thermostat as they were before, coiling the long thermostat tube behind the cooling plate and ensure the end is clamped by the holding bracket as it was when you took it out.

It is a good idea to do a quick test at this point to see that the fridge now comes on as it should. And try turning the temperature control to zero to check that the pump turns off. TURN OFF THE POWER again whilst you continue to re-assemble the fridge.

Re-assmble the front control panel and bolt back in place, put the light shade back. Put the door back by gently placing it on to the bottom hinge spike and carefully closing it around the lampshade. Then remount the top hinge.

Put the cover back on to the cable connections at the back and you should now have a properly working fridge.

neilm
October 2006
I am sorry that I do not have an answer to your question, but my Scandinova has also packed up. I believe it is the thermostat as the green light is permanently on. I wondered where you got your replacement spare part from and also if you have fitted it yet.

Pauline
January 2006
Mend Kitchen Appliances, Refrigerators
Free repair help for refrigerators

How to mend ...

Find out how to mend just about anything howtomendit.com for free repair help, information and advice.
Mend Kitchen Appliances, Refrigerators
Free repair help for refrigerators