Recent: Trying to find lawn mower part- Power Devil PDG4037R?

Mend Ryobi Grass Trimmers

Mend Garden Tools, Grass Trimmers
Find out how to mend it for free.

Ask Question
Mend Garden Tools, Grass Trimmers
Click here to mend Ryobi grass trimmers

Mend > Grass Trimmers

Mend Garden Tools, Grass Trimmers

ryobi ss30 carb adjustment?

My ryobi ss30 starts and idles fine, but boggs down when wide open, when I put the choke half open it will run faster but rough. I cleaned the air filter and muffler and I checked the exhaust port for carbon build up, none. I can't fiqure out how to adjust the carb. I found the white and red carb knobs but can't get them to move. Is there a special tool to remove them? How do your adjust the carb? Maybe Joe Dudek knows.
E-mail me at jpurpa@yahoo.com
Joe

Joe
May 2006
I know all of you are excited about this trick but just remember you are talking about a 2 stroke engine. you want to tune it to the point of perfection and then back it off just a little. Too much air or not enough will make that puppy seize. I want everyone to remain happy.

IronWill
December 2013
On my EX 26, I did the dremmel cut on the adjustment screws (just the inside one on the left). About half a turn. Worked like magic... thanks for the suggestion.

Mike
September 2013
Pulled the caps and adjusted my old SS30 and it runs likes its new. I have had to run it on half choke for the last few seasons and now it revs up smoothly on no choke. I bought it from a friend 3 years ago who just bought a new one after fuel lines rotted. It a 2004 model and have had no other issues with it.

Chevman4life
August 2013
Did they make carbs without adjustment screws. My machine is from 2005 and I can't find any adjustment screws on it at all. The only adjustment screw is an idle screw. My 52002 Ryobi now only starts with starting fluid(ether), but struggles to stay running, and has no power. I cleaned out the exhaust. Plug seems fine, but I haven't yet replaced it. For a while, it would only stay running with the choke on.

bruce
April 2013
worked for me! thanks a million. 1/4 turn ccw, with small nosed pliers, I hv Ryobi RLT26CDS

Neil Connolly
May 2012
Thanks to all. I used some needle nosed pliers and adjusted the right setting a little more than a 1/4 turn ccw and she runs like new. I no longer have to trim with the choke on. =)

Rich from NC
April 2012
Worked like a charm! Thanks.

Justin
April 2012
I also used my dremmel to cut a slit on each of the two black adjustment screws. It did cut the housing as well but that's not an issue. 1/2 turn out on the H screw with a small flat tip screwdriver and it runs better than it ever did. It took all of 4 minutes to cut and adjust! I was about to throw it away or buy a new carb... Glad I did an internet search for this!!!

ifixanythingwithatorchandhammer
February 2012
I had the same problem, for 2 years I could barely use the trimmer. Did all maintenance, no change. Then I turned each screw CCW 1/4 turn, and it runs perfect!!!! THANKS!

mike
January 2012
Same problem here... After doing all maintenance and 2 years of struggling to keep it running.... I backed each screw out a quarter turn and it runs like new!!

mike
January 2012
Only took one look to identify the adjustment screws. Didn't even need to break out the dremel tool. Used a snap ring pliers from my tool box...stick one end into the "notch" that Ryobi uses, the other end between the screw and the carb housing, and turn. The screw offers very little resistance, and a 1/4 turn ccw did the trick. Readjust the idle screw as needed and voila, no more bog when accelerating. Unit starts on the first or second pull now too.

Florida Homeowner
October 2011
thanks for all your info,
mine now sorted cut two slits adjust away we go
thanks

gazc01
September 2011
Once I found the two adjustment settings it was a breeze. On my model, they look like 2 small black studs on the forward side of the carb (in reference to the attachment end). It took longer to identify them than it did to make the adjustment. The trimmer is running like brand new now. Thanks to those who shared the information.

Greg
September 2011
My parents (seniors) purchases the ryobi lawn trimmer from home depot. NEVER WORKED OUT OF THE BOX! home depot said they couldnt return it because they put gas in it!
THANK YOU for this solution 2 years of heart ache 2 repair shops.
I cut the slits with dremel tool
I fixed it in under 5 min!

webby
August 2011
thr red and white plastic covers over the adjustment screws rip right off, it wont hurt any thing to do so. under the plastic are regular screws with slots for adjustments.

hoosier boy
June 2011
I had the same problem. Cleaned the carb, had a good idle but would starve out at fast speed. I had the adjusting screws which required the special tool so I used my Dremel to cut slot for screwdriver. This also cut slots in the housing that enclosed the adjusting screws but that was ok since I could the slot as a reference as to how much I had moved the adjusting screw. I opened the fast adjusting screw 1/2 turn and the engine ran like it was new. Ryobi should be ashamed of the design of the adjusting screws. It is cheaper to buy a new power head than to take it to a shop. Even a new carb costs more than a new power head. Sure doesn't help the environment to buy a new power head and then throw the old one out when a slight turn on a screw solves the problem.

Dick from Daphne
February 2011
I had the same problem on a Ryobi 780r - Pulled off the white & black covers off the adjustment screws. Closed at first both screws and then opened up to one full turn. Started up fine - made some additional adjustmnets and I was a happy gardener. Saved me $500.-.

gb11212
August 2010
thanks for that tip now i can fix al 3 ihave 1st one took me ten minites money saver

Thorsten
July 2010
I really do not like this POS trimmer. I have done this procedure a couple times already to no help. I have replaced the fuel lines and filter. Disassembled and cleaned the carb twice and and readjusted the mixtures screws. After using it a few times it continues to run worse each time. I am thinking that I need new gaskets and a diaphragm as I was running 10% ethanol gas for several years through this thing.

Jake
July 2010
any pics

aircrafty
July 2010
any pacs of the plugs

aircrafty
July 2010
throw it away!!!!!!!!!!!!! I have a 11yr old Homelite that I have not started in 5 years, 2nd pull started and ran great.

t russ
June 2010
just wanted to repeat from the previous suggestion. My Ryobi wouldn't even start. I took it to our local guy... he told me to THROW it away and buy another. He mentioined the alcohol content in the gasoline had ruined the diaphragm... I researched this web page and lit into my machine. followed the instructions. Used my Dremel, adjusted the 'H' (one on the right) CCW about a half a turn. 2nd Pull --- VRMMMMM
Thanks for all of your help
Saved me some serious bucks

Rookie
June 2010
My Ryobi chainsaw died when I opened it up.
Forced off the red & white caps and adjusted high speed jet. Now runs fine. Thanks for tip

trevorthedriver
May 2010
Well, I did the trick with taking the jets out and blowing out with carb cleaner...it ran for a day then cut off when I let it idle and then wouldnt start. I did finally get it to start with some starting fluid and it would run if I pumped the bulb.

I tore the entire carb down. Sprayed everything out with carb cleaner and air, then let it soak in parts cleaner overnight (except the gaskets, diaphragm, etc..)

Reassembled. Started right up. Ran at wide-open-throttle and adjusted the high jet and set the idle and low jet. Runs like new.

The carb on mine says "ZAMA" on the bottom. If you search youtube for "zama carburetor" there are two videos that explain the components of the carb.

Cajun Wonder from Baton Rouge, LA
May 2010
I think what is happening is the cork fuel cap is disintegrating and micro-particles of cork are getting past the fuel filter and into the jets.

Its all about China trying to own the white man $200 at a time.

Cajun Wonder from Baton Rouge, LA
April 2010
Wouldnt run off half choke.
Yanked the white and red plastic plugs off the two jet screws.
Turned screws all the way in and counted and wrote down the turns.
Wrote down which port, which screw went in - one is longer that the other.

Liberally blasted carb cleaner in both ports.

Put screws back in.
Wouldnt start.
Turned screws all the way back in and back out and made sure my counts were precise.
Fired right up.

Ran at wide open throttle adjusted screws to make it run faster and adjusted to make it idle accordingly.

Happy camper.

If you cant do this procedure, you suck and should get someone to do your lawn.

Cajun Wonder from Baton Rouge, LA
April 2010
Can someone please tell me where these adjustment screws are, or what area to look in? Do I take the air filter off?

a74aggie
March 2010
mine would run w/ full choke but stall out at full throttle. took apart the carb, cleaned, put back together, same problem. replaced the fuel lines, bulb, and filter, same problem. after reading this forum string, I took the white and red plastic garbage off of the idle adjustment screws with needle-nose. took some major yanking, I thought I might be breaking something but figured this was my last shot before scrapping the thing. then I was able to take the metal screws all the way out, shot carb cleaner in both holes. put them back in and voila, runs great.

brian
March 2010
Thanks for this information. I was also stuck with a trimmer that would not run unless on half choke, and would never reach full speed.

My adjustment screws were not covered, but they were the style that needed a spline tool to adjust. I was going to try and find brass tube to make my own adjustment tool, but then found this site. Slotting the screws sounded easy enough. I had to remove the carb cover/choke mechanism to get at them, but I was able to use a dremel cutting wheel to put slots in the screws. Adjusting the carb took seconds - had it idling off choke immediately, and running at full speed a few moments later! Simple!
..a

Andy
November 2009
This works beautifully. I was on the point of spending $330 for a new Echo and had fallen for the BS that Ryobi is just a throwaway. I had both problems mentioned here - it would only run on choke and kept cutting out. By the way, the red and white caps can be pulled out of the plastic cover by opening the slit which is underneath the caps. Maybe I was lucky but the adjustment screws underneath already had a notch for a tiny screwdriver. I used one from a watch repair kit.

thirdshore
October 2009
If you look closely you will see that the plastic retaining bracket has a slit in it. Pry that slit open and you can remove the red and white retaining guards.

I am replacing the carb internal parts when I learned the trick.

Robin
July 2009
I took a pocket knife and cut off the white and red cap. The white cap hides the small screw that tunes the air mixture at minimum, the red cap hides the screw to tune the air mixture at max revolutions. Evidently this is a big cheating on behalf of Ryobi. My weeder (6 years old) would die off at half chocke and now works just perfect, like new. Actually, it's faster

Balente
July 2009
Yeehau has the gimmick! Had the same problem -- it would only run 3/4 speed at half choke. I used a hacksaw blade to cut the ears off of the factory "no tamper" red and white plastic part -- after carefully putting the carb in a vice. Using same hacksaw blade I cut flathead screwdriver notches on the top to adjust. Opened up the high speed setting (red) and all is good. Tx.

Randall
July 2009
I started a lawn care business and to reduce startup costs I bought a reconditioned SS30 for $54 and a recon 200mph backpack blower for $75. The blower has never given me a single problem but after a month of use on the trimmer it got really hard to restart after about a half hour of use. Also began bogging and idling extremely rough. First thing I did was adjust the idle screw but that only helped a little bit. After finding the adjustment screws I cut notches with my dremel and adjusted as needed. Haven't had another problem since. My only complaint about this trimmer is its weight now that I got the stubbornness worked out. This thing will cut thru anything and the available attachments make it extremely versatile. I'd take one of these over a high priced stihl any day. By the way these kinds of equipment are only throwaways if you don't maintain them correctly and with a little patience. I have many friends who have spent hundreds of more dollars on major brands like echo and stihl who have had to spend hundreds more to have them worked on. Not to mention the downtime while its in the shop.

jtrader07
July 2009
This one took me a while to figure out. For those with the newer models that have no apparent external adjustment screws, the screws are still there but they have been hidden in order to make the fuel mixture settings tamper resistant. Unfortunately this makes it impossible to clean out the critical fuel passages that get plugged up with varnish if you forget to drain the gas from the tank before storing it for more than a month. There is one screw that goes through the center of the plastic "butterfly" that controls the depth of the metering pintle and a second screw in the main body of the carb that limits the fuel flow at WOT. Access to both screws is prevented with small plastic plugs.

To get to either screw you will need a sharp pick with a 90 degree tip that is very short. If you look down the center of the "butterfly" you will see a tiny white plastic plug that appears to have 3 ears. The second plug is located in the carb body, directly above the fuel inlet in a little protruding boss. Using your pick, reach in and stab the plug in the side then pull it out. You may end up having to remove the plug in shards as I did, but eventually you will be able to see the end of a tiny flat bladed screw. Seriously, it looks like an eyeglass screw head.

In the case of my carb cleaning, I didn't mess with the upper screw in the "butterfly". I only pulled the upper assembly and fuel bowl off, then took out the lower screw and hosed everything with carb cleaner. Put it all back together and adjusted the screw to its approximate original location and it was like I had a new machine. I swear I could cut a tree down with the trimmer line now.

acadmonkey
June 2009
I too have a SS 30, however my carb has NO adjustments other than the idle....and suffers from the same malady.....has anyone tried the fuel pick-up?

Goaliebart
May 2009
Ya there is a tool used for adjusting them.. its splined on the inside.. Only place i have got one is schools... Just use a good ole fasion pair of needle nose.. pull that red plastic off of the high end needle and back it out till it comes up ro rpm.

Scooter
April 2009
Thanks for the suggestion on grinding slots in the adjustment screws. 1/3 turn to the left on the high made all the difference to get it to run.

After being so annoyed that a special tool was required and the local Ryobi shop was going to charge $100 to adjust it with a 3 week wait..... Also finding out that these motors are designed to be throw aways after a year or two of standard homeowner use. I was determined to not buy another Ryobi product. I was getting ready to spend the money on a Stihl setup.....

Glad I searched this out just to get this one working. When it actually dies, it will be replaced with a Stihl.

Matt
April 2009
Cutting Slits in the Carb adjustments worked perfectly! Thanks for the tip! I was having the same issue with it bogging down when increasing throttle and it was because it was out of adjustment.

Yeehau
October 2008
hey i found another that said you could use a dremel to cut slits into the carb adjustment knobs (the 2 rusted "tits" facing front on the carb) and then use a flat head to adjust. i did it and it worked great! when looking at them the left one is for the idle and the right is for the full speed. if yours bogged down during idle then adjust clockwise if it doesn't start then adjust counter clockwise. now for the top speed. start it and run it up full speed. when i turned it counter clockwise it got alot faster very quickly. i know you want the fastest thing ever but don't over do it!!! get that nice balance of what sounds good and stable and what will cut the hell outta some grass. note: when you cut the slits you will have to cut a little bit into the side. you'll see what i'm talking about. and if you dremel isn't strong enough then use a real drill. that's what I did because my dremel died. but be careful and have a steady hand!!! go slow and it will turn out ok. rushing will only cause you to f@ck something up.

Teddy Byrd III
September 2008
try changing the fuel filter

mike
November 2007

Automatic Answer

We may have found other answers which could help you.

Click here for Carb Adjustment Starts
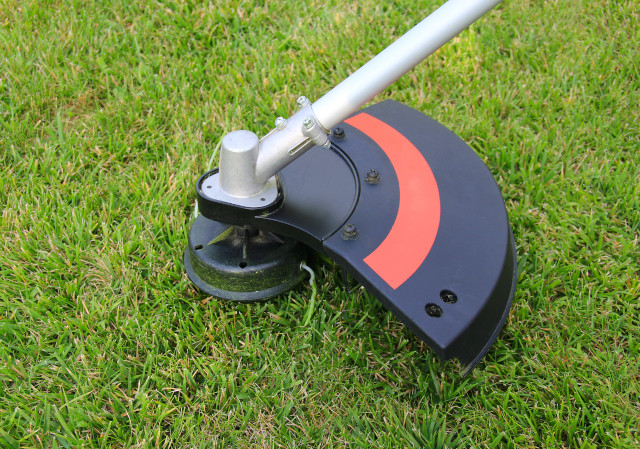
Mend Garden Tools, Grass Trimmers
Click here to mend Ryobi grass trimmers

Other models...

How to mend ...

Find out how to mend just about anything howtomendit.com for free repair help, information and advice.
Mend Garden Tools, Grass Trimmers
Click here to mend Ryobi grass trimmers